Clue #4 - Sweet Freedom Mystery!
Welcome to our Sweet Freedom Mystery – Clue #4!
We're more than halfway through our Mystery - only ONE more clue remains prior to the Big Reveal on February 14, 2020!
Fabrics = Blue,
White or White on White, Patriotic, Patriotic fabric panel (below)
 | |
|
AccuQuilt GO! Die = 2½” Strip Die (2" Finished)
 |
| 2½” Strip AccuQuilt GO! Die #55017 - several other strip die options are available, this is the one I'm using ;-) |
Cut Fabrics:
Blue
Blue
- Two (2) 2½” x 48½" fabric strips (OR whatever your average fabric strips length measurement is determined to be - check below for additional instructions on Fabric Panel Prep*)
White, White on Whites:
Patriotic Sweet Freedom Mystery Fabric Panel:
- Two (2) 2½” x 24½” fabric strips, (OR whatever your average fabric strips length measurement is determined to be)
- Two (2) 2½” x 48½” fabric strips, (OR whatever your average fabric strips length measurement is determined to be)
Patriotic Fabric Strips
- Four (4) light/dark patriotic fabric strips = 2½” x 24 1/2" - 26½”, depending on how you choose to sew your strips together - whether end-to-end OR on the bias
Patriotic Sweet Freedom Mystery Fabric Panel:
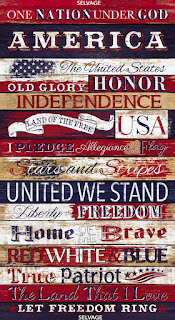
- Timeless Treasures Stars & Stripes Pledge of Allegiance panel - trim ALL four (4) edges to 1/4" seam allowance
 |
| Timeless Treasures Stars & Stripes Pledge of Allegiance fabric panel |
Good cuts result in great sewing & piecing!
AccuQuilt has a great video on HOW to cut fabric strips
Cutting Tip:
Cut your fabric ‘chunks’ ½” longer
and wider than your ‘actual’ die. Layer up to (4-6) layers of fabric at a time, depending on 'which' GO! cutter you may have.
And don't forget about fabric grain - as described in the AccuQuilt Flying Geese video tut .
And don't forget about fabric grain - as described in the AccuQuilt Flying Geese video tut .
 |
| Starting to cut 2½” fabric strips |
Additional strip cutting techniques/tips may be found by revisiting our Clue #1 post - https://sweetfreedommystery.blogspot.com/2020/01/sweet-freedom-mystery-clue-1.html
Alternative cutting: for those who may be cutting your strips w/rotary cutter/mat/ruler, NO worries! You may cut your strips according to the sizes given, utilizing the ‘lengthwise’ grain of fabric, just as we are doing w/AccuQuilt GO! Dies. With this method - NO seams to get yardage requirements for our strip units. Do what makes YOU Happy ;-)
You may certainly opt to cut your fabric 'chunks' w/rotary cutter & ruler - I use whichever method happens to be 'handy' at the time.
 |
| Trimming patriotic fabric panel to 1/4" seam allowance and White on White 2½” fabric strips |
*First - Prepare your Patriotic Fabric Panel:
We first need to prepare our patriotic fabric panel by first 'trimming' ALL four (4) perimeter edges to a 1/4" seam allowance. Using a ruler with good 1/4" markings, w/rotary cutter, I have found to be the most accurate and quickest!
 |
| Trimming the patriotic seam allowance to 1/4" |
Measure your fabric panel 'after' trimming ALL four (4) sides to 1/4" seam allowance, Press completely to get ALL the wrinkles/creases out. Measure across the top/middle/bottom of your panel. Take the average measurement and cut the length of your fabric strips that measurement.
Example: my panel measurements: Top = 23 1/4", Middle 24", Bottom 23 1/2" = 70 3/4" ÷ 3 = 23 5/8". (I will sometimes take deeper/shallower seam allowances when dealing w/panels, to get a final measurement that is easier to deal with to achieve an 'end result' measurement like 24".)
Repeat this measuring process for the 'length' of your patriotic fabric panel by measuring the 'left' side from top to bottom, the middle from top to bottom, and the right side from top to bottom. Take ALL three measurements, add them together and divide by 3 to get your 'average' measurement. This is the measurement of the 'length' of your fabric strips for the 'sides' - left & right, of you panel. Hopefully, it's close to 48 ½” - we will have a 'fudge-factor' of about +-1".
Since NO two fabric panels will measure the same, we are giving these measuring instructions to allow you to adapt your panel to fit.
Sew:
One (1) White or white on white 2½” fabric strip to the top AND another 2½” White or white on white fabric strip to the bottom of the panel, trim to size IF necessary. Press fabric strips open/flat, pressing seams towards the white or white on white fabric strip.
Sew from the 'back side/wrong side' of the
fabric panel with the 2½" fabric strips next to the feed dogs of your
machine to not only assist you in getting your 1/4" seam allowance
biting 'into' the interior of the fabric panel a few threads in, so as
to ensure none of the 1/4" selvage is peaking through but to help with easing your fabric strips onto the fabric panel to help keep everything straight and lying flat.
Next - sew the Blue 2½" x 48½” (OR whatever your 'average' fabric strips' length to each side of the patriotic fabric panel. Press, pressing seams toward each Blue fabric strip. Once seams are pressed, then sew your white or white on white fabric strips to each side - left/right or your Blue fabric strips you just sewed/pressed on the sides of your patriotic fabric panel.
Finally, sew a light/dark 2½" x 26½” fabric strip together on the bias:
Example: my panel measurements: Top = 23 1/4", Middle 24", Bottom 23 1/2" = 70 3/4" ÷ 3 = 23 5/8". (I will sometimes take deeper/shallower seam allowances when dealing w/panels, to get a final measurement that is easier to deal with to achieve an 'end result' measurement like 24".)
Repeat this measuring process for the 'length' of your patriotic fabric panel by measuring the 'left' side from top to bottom, the middle from top to bottom, and the right side from top to bottom. Take ALL three measurements, add them together and divide by 3 to get your 'average' measurement. This is the measurement of the 'length' of your fabric strips for the 'sides' - left & right, of you panel. Hopefully, it's close to 48 ½” - we will have a 'fudge-factor' of about +-1".
Since NO two fabric panels will measure the same, we are giving these measuring instructions to allow you to adapt your panel to fit.
Sew:
One (1) White or white on white 2½” fabric strip to the top AND another 2½” White or white on white fabric strip to the bottom of the panel, trim to size IF necessary. Press fabric strips open/flat, pressing seams towards the white or white on white fabric strip.
 |
| Sewing 2½" fabric strip just inside the seam line on the back side/wrong side of the panel, to ensure NO seam allowance fabric is revealed on right side |
Sewing Tip:
Next - sew the Blue 2½" x 48½” (OR whatever your 'average' fabric strips' length to each side of the patriotic fabric panel. Press, pressing seams toward each Blue fabric strip. Once seams are pressed, then sew your white or white on white fabric strips to each side - left/right or your Blue fabric strips you just sewed/pressed on the sides of your patriotic fabric panel.
Finally, sew a light/dark 2½" x 26½” fabric strip together on the bias:
 |
| Sewing light/dark 2½ strips together |
Luckily for us - our AccuQuilt GO! Strip die(s) cut these fabric strips so precisely, lining these pieces up prior to sewing is a breeze. Notice the Blue line on my sewing machine/extension table? That's an additional visual aid I use to line up my fabric strips for sewing. Painter's tape works well, too.
Completed Sweet Freedom Mystery panel w/strips sewn onto ALL four (4) sides:
This patriotic fabric panel has one 2½" light/white-on-white fabric strip sewn to the TOP and another to the BOTTOM, then one (1) 2½" Blue fabric strip and Next a white-on-white 2½" fabric strip are sewn to each side, followed by a pieced light/dark patriotic 2½" fabric strip is sewn to each side for a Total of three (3) 2½" fabric strips sewn to EACH side. It is important that the TOP and BOTTOM 2½" fabric strips are sewn FIRST, followed by the side 2½" fabric strips.
 |
| Sweet Freedom Mystery panel w/fabric strips |
Press the seams we created to sew the 2½ strips together Open after first pressing FLAT.
Measuring Tip:
Measure and check the first seams of your first 2½ fabric strips, to ensure you have your scant 1/4" properly sewn and adjust accordingly. Additional scant 1/4" seam allowance info may be found in our Clue #2 of our Sweet Freedom Mystery.
Once ALL the 2½ fabric strips are ALL sewn to our Sweet Freedom Patriotic Mystery panel, this will bring our panel to the size we need for our next clue...Stay Tuned!
Final Sewing/Pressing Results for Clue #4:
- One (1) Patriotic Sweet Freedom Mystery panel w/fabric strips added = 36 1/2" x 48 1/2" completed (Finishes at 36" x 48" roughly. If yours measures a little more or less, NO worries, we will be able to accommodate up to 1" fudge-factor ;-)
We wish to extend a hearty Thank YOU to EVERYONE for
your participation in our inaugural patriotic Sweet Freedom Mystery. Each quilt created will be awarded to a Combat
Service Member or Veteran to Honor their service and sacrifice for our country.
Happy Sewing,
Deb Lindley
Illiana Quilts Of Honor
Sweet Freedom Mystery Facebook Group:
https://www.facebook.com/groups/SweetFreedomMystery/
Clue #5 scheduled to be released 'around MIDNIGHT' on Tuesday, February 11, 2020...See You Then!
Sweet Freedom Mystery Info:
Fabric Requirements
Clue #1
Clue #2
Clue #3
Clue #4
Clue #5
Sweet Freedom Mystery Facebook Group:
https://www.facebook.com/groups/SweetFreedomMystery/
Clue #5 scheduled to be released 'around MIDNIGHT' on Tuesday, February 11, 2020...See You Then!
Sweet Freedom Mystery Info:
Fabric Requirements
Clue #1
Clue #2
Clue #3
Clue #4
Clue #5


Comments
Post a Comment